
How to Make a Multi-Page AI Comic: From Story Idea to Your First Episode
Create your first AI comic with a practical three-page story example. Learn character references, page layouts, story continuation, draft review and credit costs.
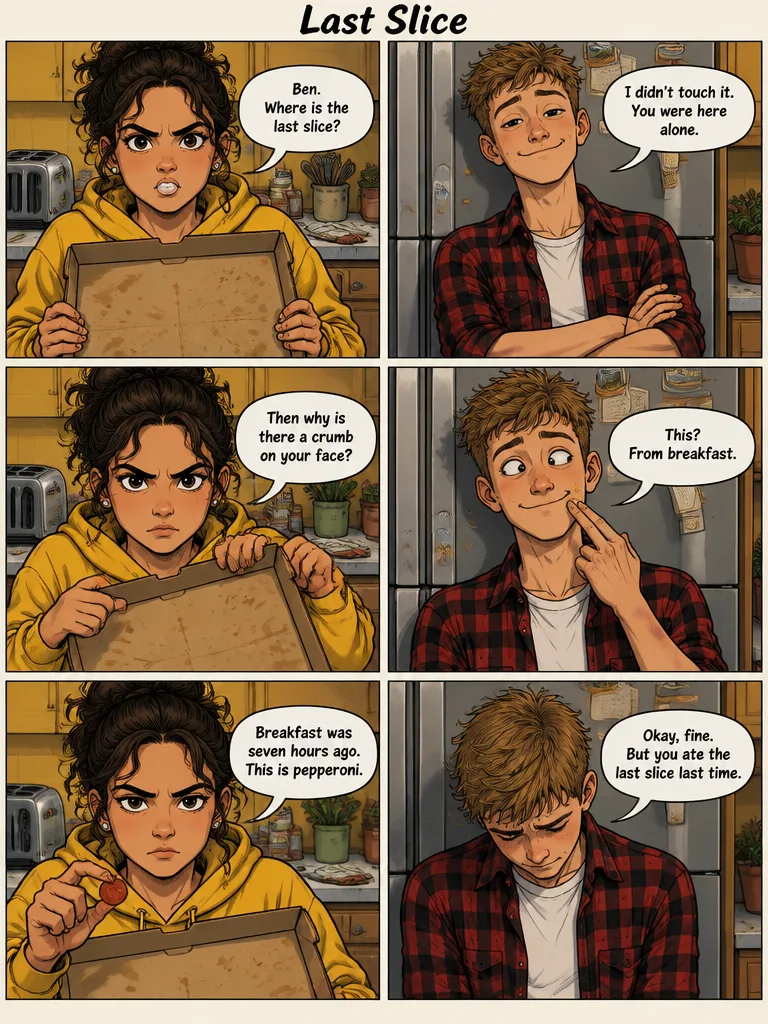
You have a story, a recurring cast and a scene you want people to see. The hard part is turning that idea into readable panels—and making page two feel like it belongs to page one. This guide shows how to start a short AI comic in 1Bit AI, use character references and continue the story one reviewed page at a time.
Open the AI Comic Maker to see the tool, or start your first comic page in the workspace. You will need to sign in and have credits to generate artwork.
What can you make with an AI comic maker?
Start with a small project: a four-panel joke, a classroom explanation, a mascot adventure or a three-page webcomic draft. A short comic gives you room to check the story and art before committing to a longer series. The same workflow can help a writer test a scene or a teacher turn an abstract idea into a conversation.
1Bit AI generates a complete page image with panels and dialogue. You can then turn a generated result into a comic project and request the next scene. This is a page-by-page workflow: you decide what happens next and review each draft. It does not automatically produce a finished book from a long manuscript.
Step 1: Write a story that fits one page
A good opening prompt names the characters, establishes a setting, describes a small problem and ends with a visible change. Keep the cast small and the action easy to draw. An entire chapter squeezed into one page usually needs more editing than a single clear scene.
Follow Mina and Pip through a three-page adventure: a rainy-night meeting, a locked observatory and a moon-bound goodbye. The AI-generated story illustrations below show the intended narrative beats for these example prompts; they are illustrative artwork, not captured outputs from the 1Bit AI comic workspace. Use the prompts as starting points and review your own results.
Mina, a bicycle courier with a yellow raincoat and a red satchel, finds a tiny robot called Pip under a bus shelter on a rainy evening. Pip has a square blue head and one orange antenna. In four panels: Mina notices Pip, offers shelter, sees a delivery label on its back, and discovers that the destination is the moon. Warm adventure tone. End with Mina saying, “That is outside my delivery zone.”
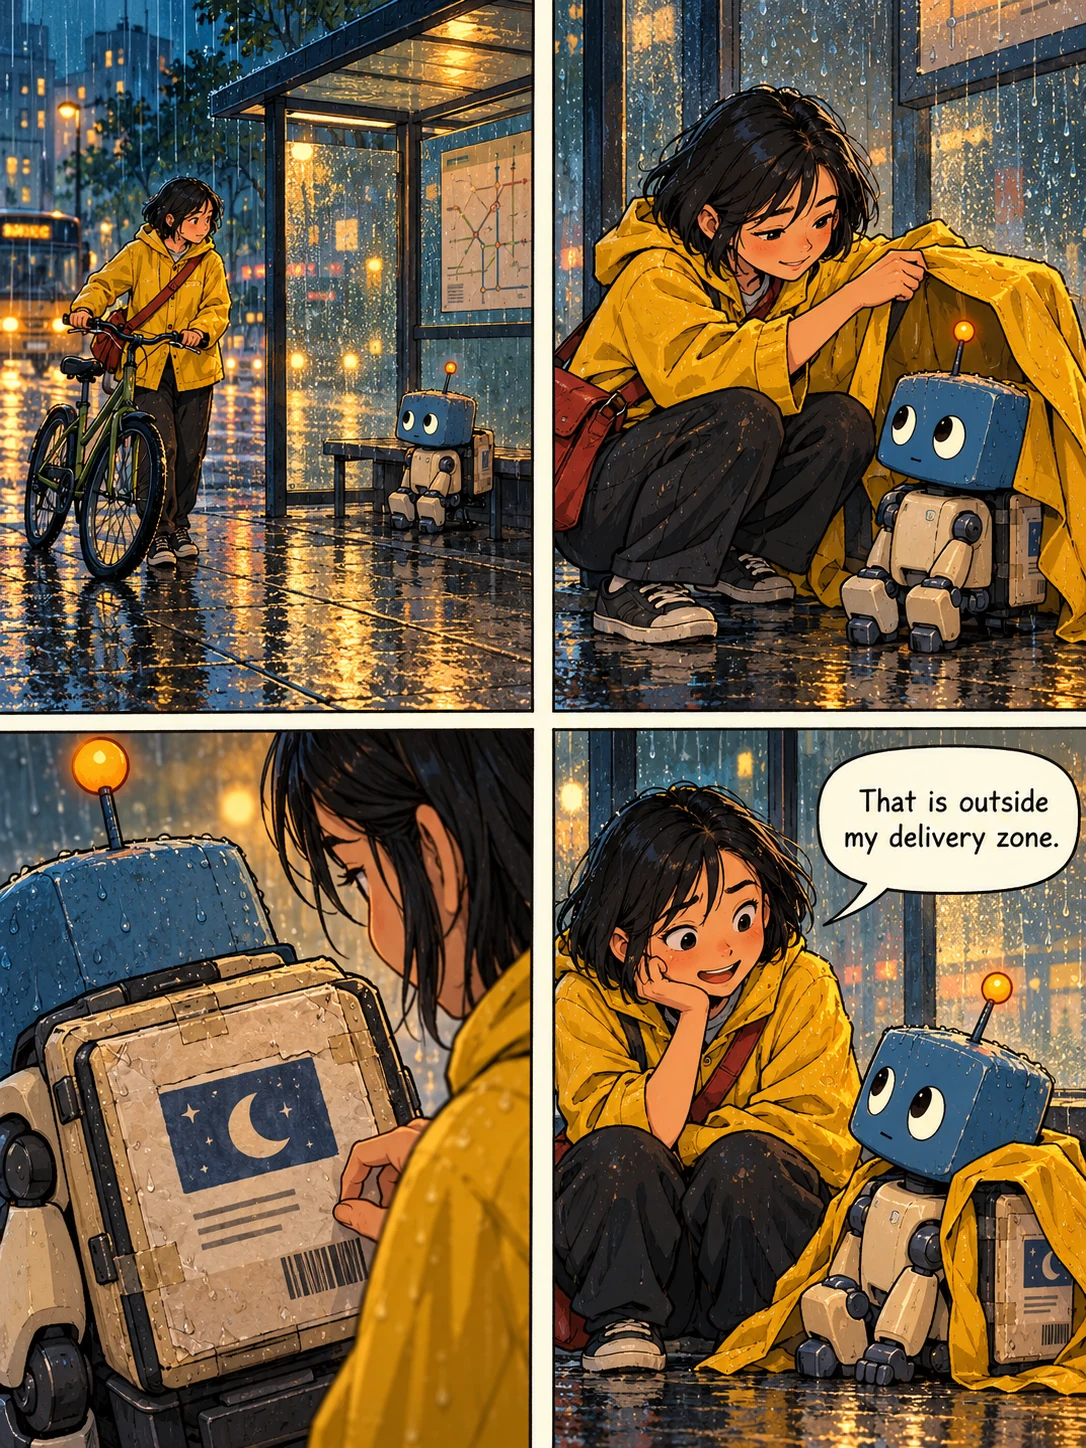
This has one setting, two characters and one reveal. It gives the page a purpose: introduce the cast and create a reason to turn the page. If you need particular dialogue, include it in quotes, then check the generated lettering for accuracy.
Step 2: Add character references and choose a layout
If you already have character designs, add up to three reference images with different character names. Use those names in your story so the tool can connect each reference to the right role. Choose images where faces, silhouettes and outfits are easy to see. You can also begin without uploads and describe the cast in words.
References guide appearance; they do not guarantee identical faces or clothing in every panel. Give each character a few stable visual anchors, such as Mina’s yellow coat and red satchel. Avoid changing names, outfits and descriptions between scenes unless the change is part of the story.
Choose from 71 page layouts or start with Auto. A four-panel layout suits the setup and reveal above. A conversation may work better with alternating shots, while a big discovery may need a splash-style layout. Pick the image size for where you expect to share the page, and check small-screen readability if the comic is for social media.
For a reusable character brief, continuation prompt and continuity checklist, read how to keep characters consistent in AI comics.
Step 3: Generate and check page one
Review the credit cost shown in the workspace before generating. For the first page, generation costs 50 credits without uploaded character references or 100 with references. Look at the completed page before continuing:
- Can you follow the panel order without an explanation?
- Are Mina and Pip distinguishable in every panel?
- Does the final panel reveal the moon destination?
- Are the speech bubbles readable and assigned to the correct speaker?
Check the image itself, not just whether the story description sounds right. A missing delivery label or an unreadable punchline changes the scene. It is easier to resolve an opening-page problem before building the next scene around it.
Step 4: Turn the result into a story project
Choose Continue Story on a generated result. You can also go to Continue a story, open a recent comic and choose Use as page 1. That uses the existing result to set up the project without another generation charge. Generating each next page, finale or replacement in a story project costs 100 credits, with or without character reference images.
The project keeps the story’s pages together and gives you a place to continue. You do not have to treat every scene as an unrelated image prompt. Keep your continuation focused on the next beat rather than retelling the entire opening.
Step 5: Continue the comic with a specific next scene
For page two, give the characters a decision and a new obstacle:
Continue immediately after the bus shelter scene. Mina decides to help Pip find a way home. They reach a closed observatory on the hill. Keep Mina’s yellow raincoat and red satchel, and Pip’s blue square head and orange antenna. Show their arrival, an attempt to open the gate, and Pip projecting a small star map onto the lock. End as the gate clicks open. Do not reveal what is inside yet.
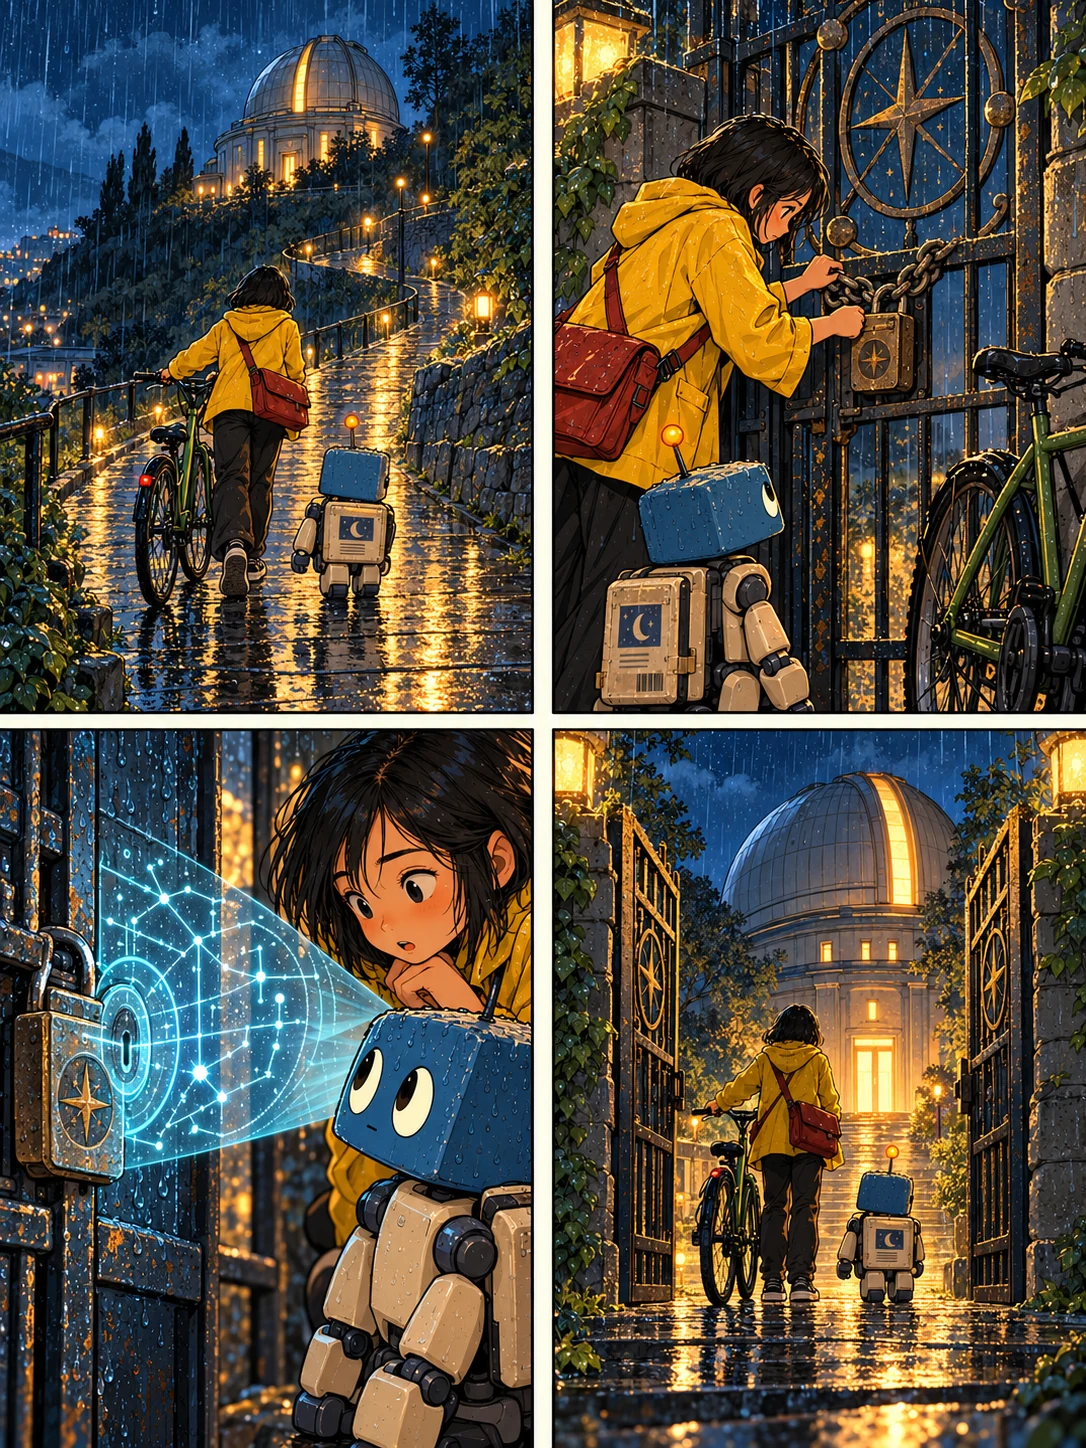
The prompt says what changes and where to stop. That stopping point matters: if page two solves the whole problem, page three has little work left to do. Check the displayed cost, generate the next page, then inspect the draft and its story summary.
Keep the page when it fits. If it does not, discard the draft before requesting another generation; replacement generations also cost 100 credits each. If the artwork and summary disagree, correct the story facts during review so the next scene follows what actually happened.
Step 6: Give the short story an ending
For a three-page test, plan the ending before generating another scene. Use the finale option when you are ready to wrap up, and describe the resolution you want:
Final page: inside the observatory, Mina and Pip discover a tiny launch pad for robot mail carriers. Pip boards a small moon-bound capsule. Before leaving, Pip gives Mina a glowing star-shaped delivery badge. End with Mina back on her bicycle at dawn, smiling at the badge. Resolve their goodbye warmly; do not introduce another villain or cliffhanger.
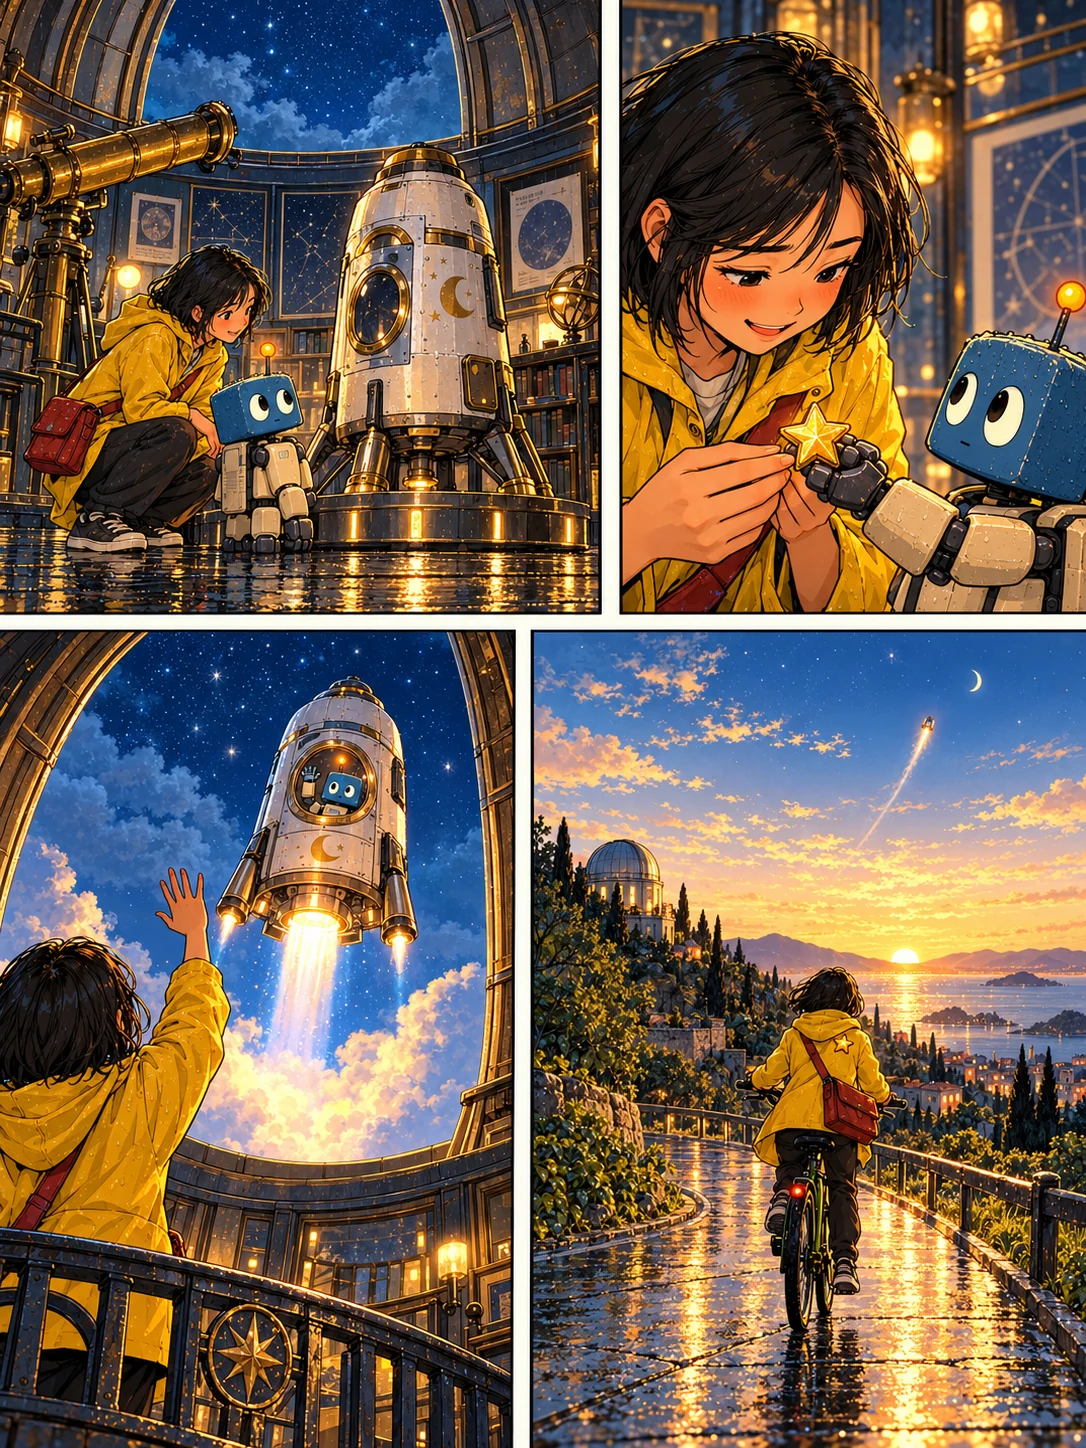
A small, resolved story is a useful first project. You can review all three pages for pacing, character appearance and dialogue before attempting a longer episode.
Common problems and how to improve the next draft
The character looks different
Check that you used the same character names and visual anchors. At the first-page stage, use clear reference images if you have them. In continuation instructions, repeat the details essential to the scene. Review the result rather than assuming a reference guarantees continuity.
The page feels crowded
Reduce the number of events and shorten the dialogue. Let the art carry the setting and action. Move the second location or extra reveal to the next page instead of asking one page to cover everything.
The story moves too far ahead
Specify the final beat: “End when the gate opens” is more useful than “continue their adventure.” Before keeping a draft, check its summary for changes in location, objects and character knowledge.
You need to change one speech bubble
The output is a page image, not a layered comic document. The project workflow reviews and replaces page drafts; it is not a panel-by-panel drawing or lettering editor. Plan time for a separate image-editing step if precise final lettering or print preparation is required.
Download and review before sharing
Download available page images from the workspace and read them at the size your audience will see. Check spelling, bubble order, margins and visual continuity across the sequence. A downloaded page is not an automatically assembled print-ready book; arrange and prepare the pages for your publishing format separately.
Start with one scene today
You do not need a complete graphic novel script to test your idea. Start with two characters, one setting and a reveal. Generate the opening, use it as page one, and decide whether the next scene deserves another page.